How to Create a Save State in Dragon Age Veilguard: Ultimate Guide for Adventurers
Key Takeaways
- Creating custom save points is crucial for retracing your steps or troubleshooting glitches in Dragon Age Veilguard.
- Autosaves only cover specific checkpoints, so manual saves give you more control over your progress.
- Named save files help you remember exactly where you left off, making it easy to pick up a quest or unglitch your game.

If you’re exploring the vast, mystical realms of Dragon Age Veilguard and need a reliable way to save your progress, you’ve come to the right place. Today, we’ll go over everything you need to know about creating a “safe state” in Dragon Age Veilguard a crucial skill that can save you time and effort as you navigate missions, battle enemies, and explore new areas.
Step 1: Accessing the Save Game Menu

To start creating a safe state, follow these steps:
- Press the Start Button: This opens the main menu, where you’ll see various options.
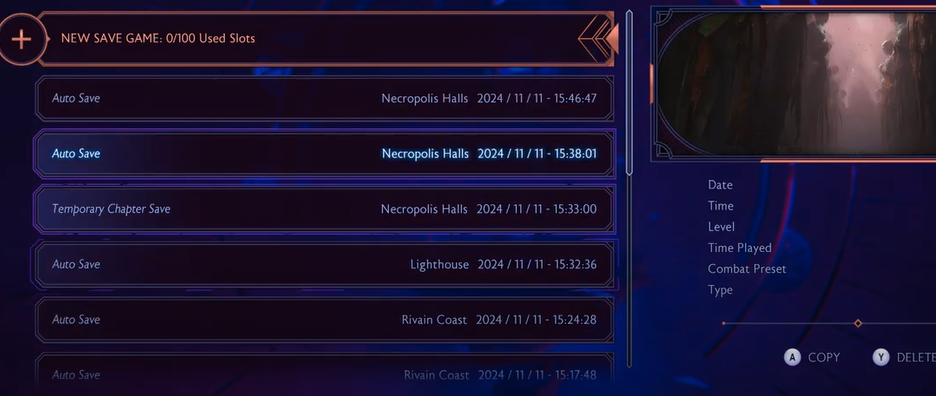
- Select “Save Game”: Navigate to this option. Here, you’ll find all your save slots, including autosaves and manual saves.
Step 2: Understanding Autosaves and Manual Saves

Dragon Age Veilguard comes with an autosave feature, but there are key differences between autosaves and manual saves that you should know about:
- Autosaves: These occur automatically at checkpoints or major events. While they’re helpful, they don’t let you choose exactly where to save, which can be limiting.
- Manual Saves: You have full control over these. By creating a manual save, you can label your safe state, allowing for more detailed organization of your progress.
Step 3: Creating Your Own Safe State

Follow these steps to create a manual save point:
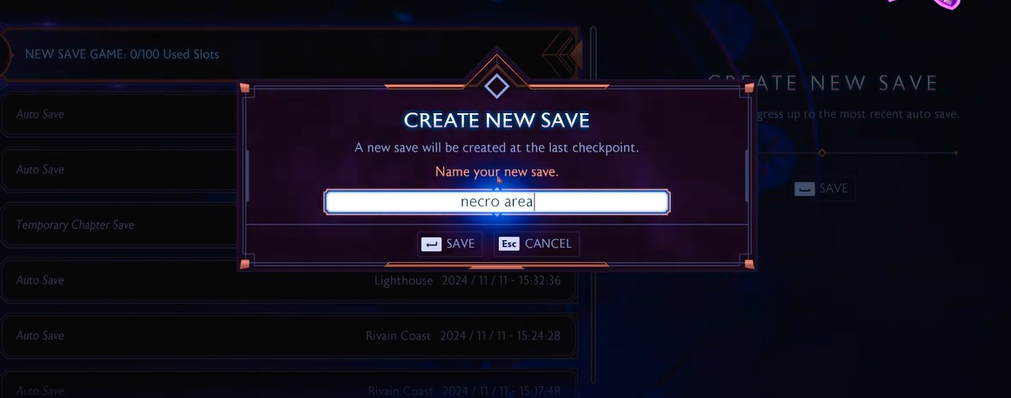
- Select “Create New Save”: Highlight and click on this option. You’ll be prompted to create a new save file.
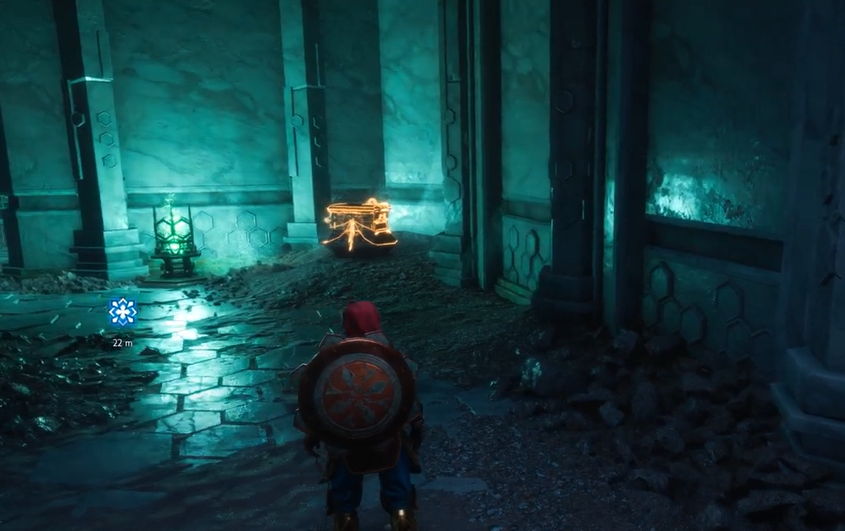
- Name Your Save File: This is where you can get creative. Let’s say you’re in the Necropolis and want to remember this specific location. You could name the save file something like “Necro Area.” This helps you know exactly where in the game you are when you revisit it later.
- Confirm the Save: After naming, confirm to save your progress in the game.
Step 4: Why Manual Saves Matter
Having manual saves in specific locations makes it easier to backtrack or fix glitches. Imagine you’re deep in the Necropolis and encounter a bug that requires reloading the game. With a named manual save, you can jump right back to where you left off without having to rely on potentially outdated autosaves.
Additional Tips for Effective Save Management
To make the most of your manual saves, here are a few tips:
- Save Before Boss Fights: Manual saves are a lifesaver before any challenging battle or pivotal moment.
- Name by Mission or Location: This helps you keep track of your journey and return to specific missions easily.
- Create Multiple Saves: Instead of overwriting one save repeatedly, create new ones periodically. If something goes wrong, you’ll have several points to revert to.
Frequently Asked Questions
1. Can I delete old manual saves?
- Yes, you can manage your save files by deleting outdated or unnecessary ones to keep your save menu clean.
2. What if I forget to create a manual save and encounter a glitch?
- You may have to rely on autosaves, but that’s why it’s best to create regular manual saves at key points.
3. Does saving manually affect game performance?
- Not at all! Creating manual saves doesn’t impact gameplay performance; it simply takes up space in your save files.


