Down Below walkthrough in Stalker 2: Guide to Navigating the Point of No Return
Key Takeaways:
- Prepare Thoroughly: Stock up on medkits, grenades, and ammo before starting the mission as supplies will be critical.
- Strategic Combat: Use stealth where possible and prioritize headshots and grenades to handle tough enemies.
- Explore Thoroughly: Loot every room for essential items and experimental armor that will aid in the next mission.
“Down Below” is one of the most intense and pivotal missions in Stalker 2, marking the infamous “point of no return.” Once you embark on this quest, you can no longer backtrack to explore or complete side missions. With its mix of underground exploration, tactical combat, and a dramatic boss fight, this mission pushes your skills to the limit. This guide will walk you through each stage, ensuring you’re fully prepared to conquer this challenging chapter.
Setting the Stage: Preparing for the Down Below Mission
Before starting the “Down Below” mission, you’ll rendezvous with your allies at the Polissya Hotel. But hold up this is your last chance to take care of unfinished business in the Zone. Check your inventory, restock on ammo, grenades, and medkits, and ensure your weapons are in top condition. This mission demands every ounce of preparation you can muster.
Key Tips Before Entering:
- Stock Up: Medkits, anti-radiation drugs, Psi-blockers, and grenades are must-haves.
- Save Your Game: If possible, create a save file before initiating this mission.
- Combat Loadout: Equip a sniper rifle for long-range kills and an automatic weapon for close combat.
Phase One: The Polissya Hotel and Keycard Hunt

Your first objective is to regroup with your allies at the Polissya Hotel. From here, the mission escalates as you face a squad of Ward troops in a nearby gray building. These soldiers are heavily armored and armed, so precision and firepower are your best friends.
Combat Strategy:
- Engage Carefully: Use cover and grenades to clear out the 7-8 enemies.
- Loot Wisely: Search enemy bodies for supplies and a keycard.
- The keycard is typically found on Maj. Dvoryankov.
- Check Your Health: Heal up before moving on.
Phase Two: Entering the Underground Tunnels

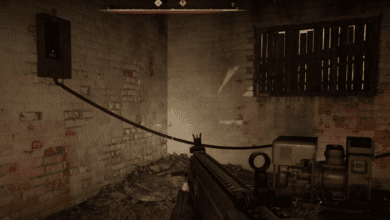
Once you acquire the keycard, head to the nearby building and follow the right-hand wall to find a staircase leading down to a locked door. Use the keycard to unlock the entrance and descend into the tunnels. Here begins the real challenge.
Navigating the Basement:
- Point of No Return: A warning will appear, emphasizing that you can’t turn back. Proceed only if you’re ready.
- Supplies: Look around for ammo and medkits to prepare for what’s ahead.
- Mutant Attack: As you move through the tunnel, mutants will ambush you. Stay calm, aim for weak points, and avoid getting cornered.
Descending the Shaft:
- Jump carefully from pipe to pipe to reach a lower tunnel.
- Loot nearby areas for grenades and medkits before progressing.
- Use grenades to fend off aggressive rats that swarm in the tunnels.
Phase Three: Navigating the Foundation

The Foundation is a vast underground complex teeming with enemies, hazards, and essential loot. Your journey here requires both patience and strategy.
Key Objectives:
- Eliminate Hostiles: Quietly take out nearby human enemies to conserve health and resources.
- Loot Everything: Medkits, ammo, and grenades are scattered throughout. Search shelves, lockers, and hidden stashes.
- Vent Passage: Locate a vent by climbing boxes in a storage room. Crawl through to proceed further.

Phase Four: The Showdown with Col. Korshunov

The mission culminates in a dramatic boss fight against Col. Korshunov. This battle is intense, with Korshunov wearing electromagnetic armor that provides significant protection.
How to Defeat Korshunov:
- Use a Sniper Rifle: Focus on headshots to break through the armor.
- Deploy Explosives: Grenades and other explosives can deal heavy damage to both Korshunov and his guards.
- Knife Finish: Once Korshunov’s armor is down, approach him with a knife for a cutscene.
- Repeat: After the first cutscene, his armor will regenerate. Repeat the process to finally defeat him.
Victory Rewards:
- Faust Pendant: Loot Korshunov’s body for this key item.
- SEVA-I Suit: Open the blue locker in the room after the fight to obtain experimental armor.
Phase Five: Preparing for the Red Forest
After defeating Korshunov, the mission transitions to its final phase. You’ll regroup with Strelok and Richter, who brief you on the next steps. Strelok reveals the high-stakes mission to stop Kaymanov from accessing the Noosphere.
Final Preparations:
- Equip SEVA-I Suit: This armor is vital for surviving the hazardous conditions of the Red Forest.
- Stock Up Again: Make sure you’re fully supplied for the next mission.
- Coordinate with Richter: Follow him as the next mission, The Last Wish, begins.
Additional Tips and Tricks
- Stealth Over Aggression: Whenever possible, avoid unnecessary firefights to conserve health and resources.
- Explore Thoroughly: Hidden supplies can make a significant difference in your survival.
- Timing Is Everything: Watch for environmental hazards like electrical traps and Bulba bubbles. Navigate carefully to avoid damage.
FAQ
1. What is the “point of no return” in Stalker 2?
The “point of no return” is a stage in the “Down Below” mission where you can no longer backtrack to complete side quests or explore the Zone. This warning appears as you enter the underground tunnels.
2. Where can I find the keycard in the Down Below mission?
The keycard is found on the body of Maj. Dvoryankov after eliminating Ward troops in the gray building near Polissya Hotel.
3. What is the best strategy for defeating Col. Korshunov?
Use long-range weapons like a sniper rifle to weaken Korshunov’s electromagnetic armor. Once the armor is down, approach him with a knife to trigger cutscenes and eventually defeat him.
4. What should I do after completing the Down Below mission?
Equip the SEVA-I suit from the blue locker and prepare for the next mission, The Last Wish, which involves navigating the dangerous Red Forest.
