Dragon Quest 3 Remake: Guide to Conquering Dreamer’s Tower and Securing the Thief’s Key
Key Takeaways:
- Dreamer’s Tower is your first true challenge in Dragon Quest 3 Remake prepare for relentless encounters and strategic navigation.
- Stock up on Chimera Wings for essential fast travel, and make good use of the first-floor Inn to rest and recover.
- The Thief’s Key is your primary reward, unlocking red doors and expanding your ability to access new areas across the game.
Dragon Quest 3 Remake captures the charm of the original game while adding a fresh coat of polish for new players and returning fans alike. One of the first major objectives is retrieving the Thief’s Key, which unlocks crucial doors throughout the game. To obtain this key, you must brave the Dreamer’s Tower, a challenging multi-floor dungeon filled with tricky enemies, treasure chests, and skill-checking encounters.

This comprehensive guide will walk you through each floor of Dreamer’s Tower, detailing treasure locations, enemy strategies, and tips to help you master this early-game challenge. Let’s dive in!
How to Reach Dreamer’s Tower in Dragon Quest 3 Remake
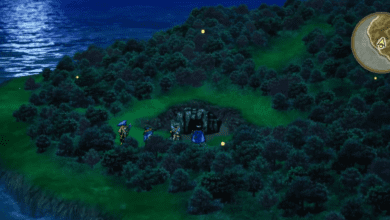
To embark on your quest for the Thief’s Key, head out from the town of Reeve, located at the northernmost point of the starting island. Once you leave the town, travel southeast to a small square structure known as the Shrine of the Plains. Be sure to stock up on Chimera Wings before heading out – these items are essential for fast travel, allowing you to escape sticky situations and return to town quickly if needed.
Inside the Shrine of the Plains, head to the southern edge to find a barrel containing a Mini-Medal. Then, proceed west to discover a hidden entrance on the hillside. This inconspicuous passage leads to the basement of Dreamer’s Tower, marked by a yellow circle on your map.
Dreamer’s Tower B1 Walkthrough: Initial Dungeon Dive
Enemies on B1: Toady, Bunicorn, Antnibbler, Slime, Batterfly
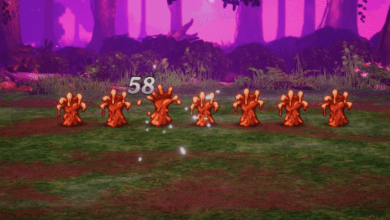
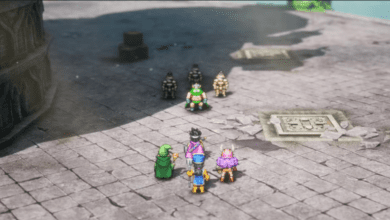
Upon entering the basement level (B1) of Dreamer’s Tower, you’ll encounter your first wave of enemies. Combat is frequent here, so be ready for battles with creatures like Toady, Bunicorn, and the classic Slime. Each enemy has unique strengths and weaknesses; for example, Batterflies are vulnerable to wind and explosive attacks.
Treasure on B1:
- Chest 1: 113 Gold Coins – Located in the northern section of B1.
- Chest 2: Hardwood Headwear – Accessible only after obtaining the Thief’s Key.
- Chest 3: Seed of Agility – Also requires the Thief’s Key.
The floor features two main exits: the east leads to a cave, while the west takes you to the Promontory Passage. Follow the green-marked staircase to reach the ground level and the first floor (1F) of Dreamer’s Tower.
Dreamer’s Tower 1F Walkthrough: The Safe Zone and First Aid Station
Enemies on 1F: Stark Raven, Bubble Slime
Once you reach the first floor, step outside briefly to observe the tower’s island setting. On this level, you’ll find an Inn – a rare luxury in early dungeons – where you can rest and recover. This Inn proves invaluable as you continue your ascent, especially if you’re low on health or magic.
Treasure on 1F:
- Chest: Chimera Wing – Found in the northwest corner.
- Pot: Antidotal Herb – Located near the railing by the Inn’s entrance.
The first floor primarily serves as a preparation stage, allowing you to stock up and regroup. To progress further, take the staircase on the eastern side, marked just below the northeast corner on your map.
Dreamer’s Tower 2F Walkthrough: Levelling Up and Grinding
Enemies on 2F: Prestidigitator
The second floor introduces Prestidigitators, magical foes who wield Frizz spells. Combat becomes slightly tougher here, so don’t hesitate to return to the 1F Inn if your party needs healing. Grinding and levelling up on this floor will prepare you for the increasing difficulty in the upper levels of Dreamer’s Tower.
Treasure on 2F:
- Chest 1: Mini-Medal – Located in the northwest chamber.
- Chest 2: Mini-Medal – Found in the center chamber of a row of three near the southern edge.
You’ll find two staircases leading up to the third floor: one in the northeast corner and another in the southwestern chamber.
Dreamer’s Tower 3F Walkthrough: Choose Your Path Wisely
Enemies on 3F: Waspion
The third floor is more complex, with multiple paths to explore. Only one of these will lead you to the correct exit, so be prepared to backtrack if needed. The Waspion is a new enemy here, capable of calling reinforcements. Take these foes down quickly to avoid drawn-out encounters.
Treasure on 3F:
- Chest 1: Boomerang – Accessible through the northeastern staircase from 2F.
- Chest 2: Mini-Medal – Located near the center, on the east side of the spiral staircase.
Make sure to explore thoroughly, as the Boomerang can be a useful weapon early in the game. When you’re ready, proceed to the spiral staircase that leads to the fourth floor and the final chamber.
Dreamer’s Tower 4F Walkthrough: Claiming the Thief’s Key
Enemies on 4F: None
The fourth floor is split into two sections: an inner chamber and an outer area. To reach the main chamber, take the stairs at the center of 3F. Interestingly, there’s no boss guarding the Thief’s Key, so you can proceed without worrying about a final showdown.
Upon entering the chamber, you’ll find an old man asleep. Speak to him, and he’ll reward you with the Thief’s Key. This key is essential for opening red doors throughout the game, giving you access to hidden areas and additional loot.
Treasure on 4F:
- Chest: Chimera Wing – Found behind the old man.
- Bookshelf: ‘The Girl’s Own Annual’ – A rare book that permanently changes the reader’s personality to Tear-Away, boosting Strength and Agility.
With the Thief’s Key in hand, your journey through Dreamer’s Tower is complete. Return to Reeve or another town using a Chimera Wing to replenish and continue your adventure with newfound confidence.
All Enemies in Dreamer’s Tower – Combat Strategies
Dragon Quest 3 Remake employs random encounters, so there’s no way to predict exactly when an enemy will appear. Below is a list of common enemies you’ll encounter in Dreamer’s Tower and suggested strategies for defeating them.
| Enemy | Weakness |
| Bunicorn | TBD |
| Antnibbler | Frizz (Fire) |
| Toady | Crack (Ice), Zap |
| Batterfly | Woosh (Wind), Bang |
| Slime | TBD |
| Bubble Slime | TBD |
| Stark Raven | Woosh |
| Prestidigitator | TBD |
| Waspion | Woosh |
Use Holy Water to reduce encounter rates if you’re low on health or resources, or Musk to increase encounters if you want to level up faster.
FAQ
Q: What is the Thief’s Key used for in Dragon Quest 3 Remake? A: The Thief’s Key unlocks red doors throughout the game, granting access to restricted areas and hidden treasures.
Q: How do I reach the Dreamer’s Tower? A: Start from the town of Reeve, head southeast to the Shrine of the Plains, and look for a hidden entrance on the western hillside.
Q: Are there any resting points in Dreamer’s Tower? A: Yes, there’s an Inn on the first floor (1F) of Dreamer’s Tower, providing a safe place to rest and recover during your ascent.
Q: What is the purpose of ‘The Girl’s Own Annual’ book on 4F? A: This rare book changes the reader’s personality to Tear-Away, boosting their Strength and Agility stats permanently.
Q: How can I reduce random encounters in Dreamer’s Tower? A: Use Holy Water to make basic encounters less frequent. Alternatively, use Musk if you want to engage in more encounters to level up.

