Fisch Northern Expedition: How to complete the the Lever Puzzle and Get the Ice Warpers Rod
Key Takeaways:
- Unlocking the Ice Warpers Rod: This special fishing rod requires completing a unique Ice Puzzle on the new Northern Expedition Island.
- Essential Equipment: Items like a lantern, glider, pickaxe, cloak, and oxygen tank are critical for success.
- Challenging Yet Rewarding: Six frozen levers need to be activated in one game session, with each requiring precision, gear, and strategy.
Are you ready to gear up and embrace the icy challenges of the Northern Expedition? In this guide, we’ll walk you through how to unlock the coveted Ice Warpers Rod a game-changing piece of equipment that boosts your fishing abilities. From finding the necessary tools to solving the complex Ice Puzzle, we’ve got you covered step-by-step.
What Is the Ice Warpers Rod?
The Ice Warpers Rod is a premium piece of equipment introduced in the Northern Expedition update. Packed with incredible stats, it’s perfect for any fishing enthusiast looking to level up their gameplay. With 20% resilience, a 75,000 kg max capacity, 60% luck, and a 50% lure speed boost, this rod is not just another tool it’s a game-changer.
But acquiring it isn’t a simple walk in the snow. You’ll need to complete a challenging Ice Puzzle that involves finding and activating six frozen levers scattered across the island. And no, these levers won’t stay activated if you leave the game or switch servers, so timing and preparation are everything.

How to Prepare for the Ice Puzzle
Before embarking on your quest, you’ll need a specific set of tools and items. Here’s what you should gather:
1. Lantern
The lantern is essential for thawing the frozen levers. To get one, head to Moosewood and speak with the Keeper NPC located behind the lighthouse. Note that the NPC only appears at night, so plan accordingly.
2. Glider
You’ll need the glider to traverse the icy cliffs and reach isolated platforms. The advanced glider is highly recommended for its extended range, but the basic one will suffice for most jumps. You can purchase the glider from the albino merchant in Roslit Bay for 900C$.
3. Pickaxe
Certain levers are hidden behind walls of ice that can only be broken with a pickaxe. Purchase one from a refill station along your journey.
4. Cloak (Optional)
While not mandatory, a cloak keeps your heat levels stable, so you don’t have to worry about freezing to death. Without it, you’ll need to rely heavily on campfires.
5. Oxygen Tank
An oxygen tank is non-negotiable. Many of the levers are located in high-altitude or oxygen-deprived areas. You can purchase one at a refill station.

Step-by-Step Guide to Finding the Six Levers
Each lever is located in a distinct area of the island. Follow this guide carefully to ensure you activate all six without issue.
Lever 1: Inside a Cave Near the Third Base Camp
- Location: (Coordinates 19870.629.537)
- Use your pickaxe to break the ice wall blocking the cave entrance. Once inside, equip your lantern to thaw the lever and activate it.
Lever 2: On a Rock Near the Cryogenic Canal
- Location: (Coordinates 19437.690.5856)
- Glide from the fourth base camp to the Cryogenic Canal. Climb the nearby mountain using your oxygen tank sparingly, and you’ll spot the lever on a small rock.
Lever 3: Hidden Behind a Rock Platform
- Location: (Coordinates 20195.855.5646)
- Glide left from the Cryogenic Canal to a secluded rock platform. Refill your oxygen tank before heading here, as the trek is long and challenging. Look behind the platform to find the lever.
Lever 4: Next to a Snowy Tree
- Location: (Coordinates 19600.544.5613)
- From Lever 3, glide toward a large snowy tree. The fourth lever is conveniently located at its base.
Lever 5: Atop a Rocky Outcropping
- Location: (Coordinates 19854.476.4970)
- Return to the fourth base camp and glide behind the big yellow tent. From there, follow the outcropping to the left, climb the tall rock, and you’ll find the lever at the summit.
Lever 6: Inside the Frigid Cavern
- Location: (Coordinates 19880.425.5380)
- This lever is located deep within the Overgrowth Caves. Start at the fourth base camp, follow the path to the right, climb the ladders, and glide down into the cave. Continue along the narrowing path until you reach the Frigid Cavern, where you’ll find a star-shaped clearing. The lever is located in the center.
Claiming the Ice Warpers Rod
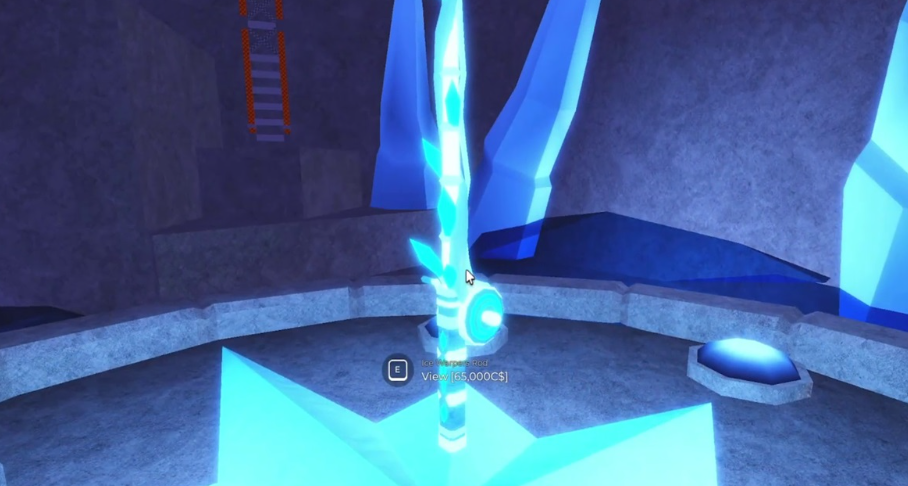
Once all six levers are activated, the Ice Warpers Rod will spawn in the same location as the final lever, right in the middle of the star outcropping. To claim it, you’ll need 65,000C$, so make sure your wallet is prepared.
Pro Tips for Success
- Heat and Oxygen Management: Keep an eye on your heat and oxygen bars. Campfires restore heat, and refill stations replenish oxygen, so use them wisely.
- Use the Cloak: If you have a cloak, you won’t have to worry about heat depletion, making your journey much smoother.
- Don’t Change Servers: Remember, lever activation progress isn’t saved if you leave the game or switch servers. Complete the entire puzzle in one session.
- Get the Advanced Glider: The advanced glider significantly reduces the difficulty of reaching certain levers. If you’re struggling with the basic glider, consider upgrading.
FAQ Section
1. Do I need the advanced glider to complete the Ice Puzzle?
No, the basic glider works for most areas. However, the advanced glider is highly recommended for its longer range and ease of use.
2. Can I skip the cloak and still survive?
Yes, but you’ll need to stop frequently at campfires to maintain your heat levels, which can slow you down significantly.
3. What happens if I leave the game before activating all the levers?
Your progress will reset. All six levers must be activated within the same game session.
4. How do I get more oxygen if I run out?
You can refill your oxygen tank at refill stations located around the island.
5. Is the Ice Warpers Rod worth the effort?
Absolutely! With enhanced stats like increased resilience, luck, and lure speed, the Ice Warpers Rod is one of the best fishing tools in the game.


